If you are tired of your old doormat (the design, the dirt, the color, the style), then paint it. I simply turned my old mat over and painted letters on it and I confess, I love it even more than when it was new.


Ingredients/Tools:
- Doormat: You can even buy one with no design on it and create your own inspirational words, message or design. Customize it.
- Fabric paint: A li'l bottle costs about $2.99.
- Pencil: to create your design.
- Brush: small if your designs are letters, medium if your designs are shapes.

Instructions/5 Steps:
1. Create your design on paper. I used Microsoft Word for mine, but you can simply use copy paper and draw on it. Play around with the design until a smile creeps in, then you know you are ready to draw it on the doormat.

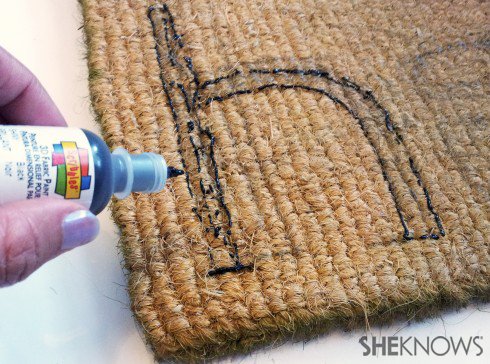
2. With a pencil, draw your design on the mat, pressing lightly at first in case you need to erase any oopsies. Make the letters thick.

3. With the fabric paint, paint the outline of the letters.
4. With the brush, fill in the letters and/or shapes.


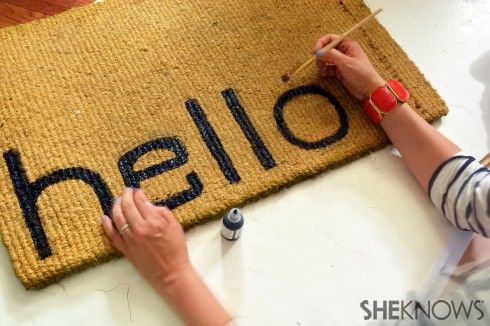

5. Let it dry for 12-24 hours, then marvel at your work.

Yep, just five steps and you have a new doormat, economically created. Upcycled. And, if your current doormat is in great condition, then maybe you want to turn it into a two-sided mat. Just turn it over and paint your very own design on the back. My painted design has held up great and it's already been a month since it's been in use. The best part is that you can claim this...

Recap of instructions:
- Create your design on paper
- With a pencil draw your design on the mat, pressing lightly at first in case you need to erase any oopsies. Make the letters THICK.
- With the fabric paint, paint the outline of the letters.
- With the brush, fill in the letters and / or shapes.
- Let it dry for 12-24 hours, marvel at your work.
Are you itching to go to your front door and peek at the back of your doormat yet? If you have any questions, or if you end up making this DIY project, email me some photos at info@adasdesigninc.com (I may even end up sharing them on my blog to inspire others to take the fun leap). Remember, there is no fail if you learn from a project and/or have a blast doing it. Feel free to copy my hello etc. design if you want. Happy DIYing.
More DIY Projects:
DIY painted keys
Restore vintage furniture
This DIY terrarium will make summer downtime so much more fun