So, I decided to create conversation-starter placemats by adding photo pockets (psst, it also keeps family and pals from fighting over who sits where).
You can use your current placemats if you want; it saves time not having to shop. I, however, decided to frolic all willy-nilly around my local fabric store, then wrestle with my sewing machine (I won), and make my own placemats with photo pockets. I created two different inspirational photo pocket placemats; one uses fabric as the pocket frame, the other uses ribbons.

I experimented with a few options on the photo frame, since my goal was to make the DIY photo pocket easy to make. I finally settled on what I found to be the easiest top two versions in making the pockets.
For ribbon photo frame:
Materials:
- Ribbon for frame
- Scissors
- Double-sided tape
- Transparent/clear inserts
- Printed photos
Instructions:
1. Cut ribbon into strips, attach double-sided tape to the center of the ribbon, then fold in half leaving room at the end to attach each strip to each other.


2. Now that you have a frame shape, place a clear sheet on top of it to draw/mark a size guide, then cut the clear sheet. Any clear plastic material will do; I used sheet protectors from Staples. Its mission? To protect the photos/cards inserted into the frame.

3. Attach the pocket frame to the placemat permanently with fabric glue, or attach it temporarily (what I did) with double-sided tape.

With photo pocket frames you can even add fun themes if you want. Want some ideas? Try an '80s theme (we all went through an oh-what-on-earth-was-I-wearing decade, choose your preference), vacation theme (it's an oh-remember-when-I-was-here type of theme), Thanksgiving theme (family photos from the previous Thanksgiving).
Now, in case you don't want to torture your family members with past photos of themselves (beehive hair, flood pants, blue eyeshadow days, fun-to-see-and-reminisce, etc.) or you simply don't want to search through albums for photos, then you can create an old-fashioned place card with a modern twist (a pocket).
For fabric photo frame:
Materials:
- Fabric
- Paper template
- Scissors
- Glue gun
- Double-sided tape
- Transparent/clear inserts
- Paper (with or without design)
- Pencil to draw template
- Marker to write name
Instructions:
1. To make the pocket frame, gather your fabric to use then draw a frame template using any paper you can find - copy paper, cardboard paper, poster board, um, hmm, err, ok, maybe not ANY paper. Toilet paper may not work. Hmm, or would it. Draw an outer rectangle 4" x 3.5, and an inner rectangle 3" x 2.5".

2. Cut the rectangular (outer and inner drawn lines). I found that the easiest way to cut the inside of the rectangle is folding the fabric in half and cutting the middle then extending your cut to the edge of the drawn lines). You now have a flat frame!
3. Glue and fold the outer edges into the inner edge. You now have a 3D frame. Next, add double sided tape to 3 sides of the 3D frame and press against the placemat. Next, insert a clear plastic into the one non double-sided taped side, it should fit nicely snugged. You now have a pocket! Insert photo and/or written name of your special guests into the pocket.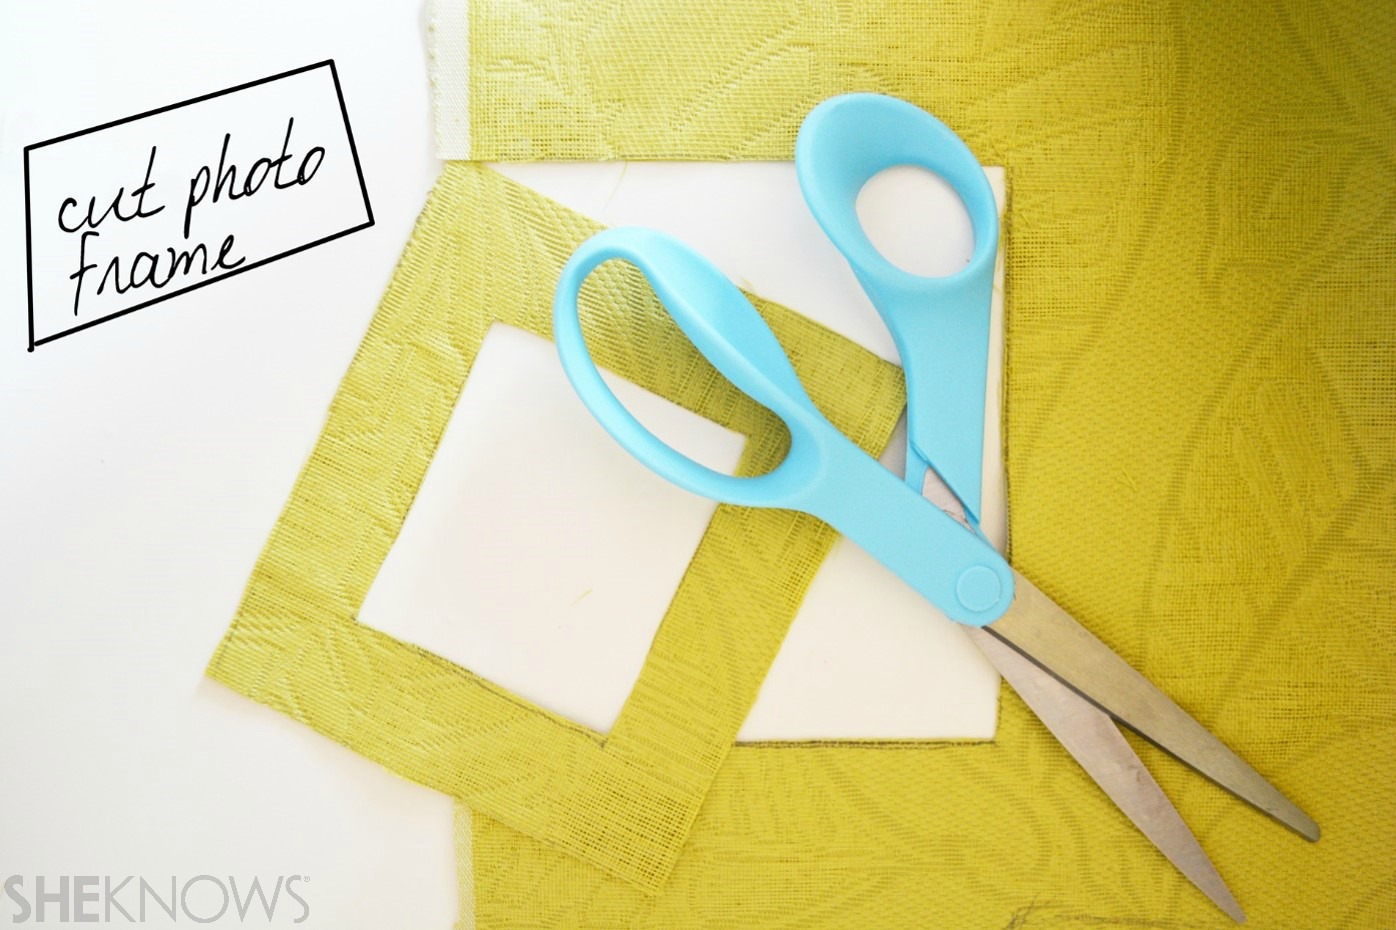


Don't forget to take a photo of your creation and show it off using the hashtag #skexperts!
Disclosure: This post is part of a collaboration with Marie Callender's and SheKnows.